The Hidden Costs of Bathroom Remodeling
A technical guide to bathroom renovation budgeting, exploring waterproofing standards (AS 3740), sand-cement floor screeds, and tiling selection.
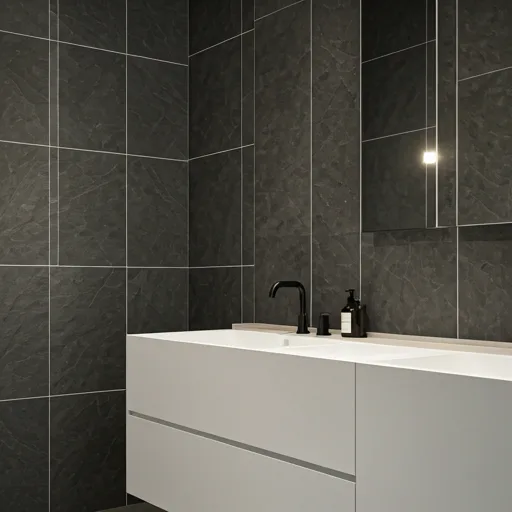
A bathroom renovation is one of the most popular home improvement projects, offering high returns on investment and significantly improving daily liveability. However, bathrooms are also the most prone to budget overruns due to hidden structural issues and trade complexities behind walls and floors. Understanding where your money goes is essential for building a space that remains dry, mould-free, and functional for decades. A successful bathroom remodel depends on proper subfloor screeding, waterproofing, plumbing updates, and tiling choices.
To avoid costly defects, homeowners must partner with registered builders who understand local standards and building regulations. From applying multi-layered liquid waterproofing membranes to reinforcing timber floor joists, every step must comply with Australian standards. Skipping structural preparation or using uncertified trades can lead to water leaks, rot in timber frames, and mold outbreaks that void your property insurance.
This technical builder's guide explores the key aspects of high-end bathroom remodeling in Melbourne, including AS 3740 waterproofing standards, subfloor screeding, drainage layouts, trade inspections, timber framing, tiling selections, and budget planning.
- 1. Waterproofing Standards: Liquid Membrane Application and AS 3740
- 2. Subfloor Screeding: Slopes, Drains, and Floor Prep Work
- 3. Screed Mix Ratios: Portland Cement and SBR Latex Additives
- 4. Plumbing Relocation: Core Drilling and Joist Reinforcements
- 5. Wet Area Wall Framing and Fiber Cement Tile Underlays
- 6. Tile Selection: Natural Stone vs. Low-Porosity Porcelain
- 7. Mechanical Ventilation: Moisture Control and Mould Prevention
- 8. Plumbing Inspections and VBA Compliance Certification
- 9. Bathroom Renovation Cost Projections and Budget Guide
- 10. Frequently Asked Questions (FAQ)
- 11. Bathroom Remodeling Synthesis
1. Waterproofing Standards: Liquid Membrane Application and AS 3740
In any wet area, premium waterproofing is non-negotiable. Australian standards set out strict regulations for waterproofing design and installation, but high-end builds exceed these minimum limits. Under the National Construction Code (NCC), all domestic wet area waterproofing must comply with standard AS 3740: Waterproofing of Domestic Wet Areas. Because timber floors in Melbourne expand and contract with seasonal weather changes, the elasticity of the waterproofing membrane is critical. We use Class III highly flexible polyurethane liquid membranes that can stretch to accommodate building movements without tearing.
Before tiling, we apply multiple coats of liquid polyurethane membrane over fiber cement sheeting to create a continuous water barrier, protecting your home's structural framing from leaks. The process begins with surface cleaning, followed by priming, and installing flexible joint bandages (bond-breaker tape) at all wall-to-floor junctions and sheet joins. We apply two coats of membrane, ensuring the dry film thickness (DFT) is at least 1.2mm, which we verify using wet film comb gauges. You can review our waterproofing methods on our services page. This precise thickness prevents water from penetrating the subfloor and rotting the floor joists.
Additionally, we conduct a 24-hour flood test before tiling begins. We plug the drains, fill the shower base with water, and monitor the water level for 24 hours to confirm the membrane is 100% leak-proof. This ensures that any microscopic defects are caught and repaired before tiles are permanently laid, protecting your investment. We compile these test reports and certificates for building approvals and client files.
Furthermore, we extend waterproofing beyond the immediate shower zone. We waterproof the entire bathroom floor and up the walls to a height of at least 150mm. In basin areas, we apply the membrane on the wall behind the vanity to a height of 300mm above the benchtop. This protects the wall framing from splash water and dampness behind custom drawers, preventing mold growth and joinery warping.
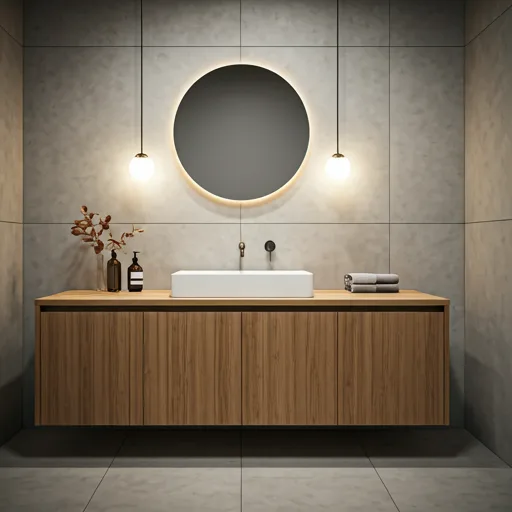
2. Subfloor Screeding: Slopes, Drains, and Floor Prep Work
To prevent water from pooling on the bathroom floor, the subfloor must be sloped toward the drains. This is achieved by installing a sand-cement screed over the structural subfloor, which we profile using straightedges. For modern walk-in showers, we prefer stainless steel linear grate drains over traditional square center waste grates. Linear drains run along one wall, requiring a simple single-plane slope toward the drain, which allows us to install large-format tiles without envelope cuts, creating a clean, modern look.
We specify a minimum fall of 1:80 for walk-in shower bays to ensure rapid water drainage, and a fall of 1:100 for the general bathroom floor. This ensures water drains quickly without spilling into adjacent rooms. You can browse our high-end bathrooms in our design portfolio. We install puddle flanges flush with the subfloor. The puddle flange allows any moisture that penetrates the tile grout to drain into the plumbing pipe rather than wicking into the sand screed, preventing musty odors and dampness under the tiles.
Additionally, we verify the stability of the timber floorboards before applying the screed. Any loose boards are secured with structural screws, and we reinforce the floor framing with cross-blocking between joists to minimize floor movement. A stable subfloor prevents the sand screed and tile grout lines from cracking under live foot traffic loads, ensuring a durable finish.
3. Screed Mix Ratios: Portland Cement and SBR Latex Additives
The durability of the tile bed depends on the quality and mix ratio of the sand-cement screed. Standard builders often use weak mixes that crumble under tile loads, leading to loose tiles and cracked grout. We mix our screeds using a 1:4 ratio of premium Portland cement to washed river sand. To increase adhesion, elasticity, and water resistance, we add Styrene-Butadiene Rubber (SBR) latex bonding agents to the mixing water. SBR latex improves the tensile strength of the mortar bed and reduces shrinkage cracking during curing.
We mix the screed to a "semi-dry" (damp earth) consistency, allowing it to be compacted and sloped easily. We maintain a water-cement ratio between 0.45 and 0.50 to minimize shrinkage cracking as the cement hydrates. For timber-framed floors, we integrate galvanized wire mesh within the screed bed to reinforce the mortar against joist movement, complying with structural guidelines. The screed is cured for at least 7 days before applying waterproofing membranes or tiles, ensuring it reaches commercial strength. You can track our construction progress on our live client portal.
4. Plumbing Relocation: Core Drilling and Joist Reinforcements
Changing the layout of a bathroom vanity, toilet, or shower requires relocating plumbing waste pipes and hot/cold water lines. In homes with concrete slab floors, this involves core drilling through the concrete to run new drain pipes. In timber-framed homes, waste pipes must be routed through floor joists. Under structural building standards, any holes or notches drilled in floor joists must be carefully calculated to avoid weakening the joist's load-bearing capacity.
Australian standards specify that holes drilled in timber joists must not exceed 25% of the joist depth and must be located in the middle third of the joist span, where bending stresses are lowest. If a pipe requires a larger hole, we reinforce the joist with structural steel plates or sister the joist with LVL beams. All plumbing work is pressure-tested before sealing wall cavities, ensuring there are no hidden leaks. We issue plumbing compliance certificates under Victoria regulations for all plumbing works.
5. Wet Area Wall Framing and Fiber Cement Tile Underlays
Old houses in Melbourne rarely have straight, plumb walls. Installing large-format wall tiles requires perfectly flat surfaces to prevent lippage (uneven tile edges). We strip original plasterboard down to the studs and check the timber framing for straightness, shimming or planing studs to create a flat grid. We then install 9mm thick water-resistant fiber cement sheets as the tile underlay substrate. Fiber cement sheets provide a rigid, moisture-resistant backing that does not warp or sag under the weight of heavy tiles.
All sheet joints are sealed with flexible, water-resistant sealants and reinforced with fiberglass mesh tape before applying waterproofing membranes, preventing sheet movements from cracking the tile grout lines. For advice on structural foundation prep, read our guide on home structural foundations and stability. This rigid wall preparation is critical for support when installing heavy marble or large-format porcelain wall sheets.
6. Tile Selection: Natural Stone vs. Low-Porosity Porcelain
The choice of tiles affects both the aesthetic character and the maintenance requirements of your bathroom. Natural stone tiles, such as Carrara marble or travertine, offer unique textures and luxury appeal but are porous and require annual sealing to prevent staining and chemical etching. Porcelain tiles are manufactured from refined clays fired at extremely high temperatures, resulting in a dense, non-porous tile with a water absorption rate of less than 0.5%.
For walk-in showers, we specify porcelain tiles with a minimum slip resistance rating of R10 to ensure safety underfoot. We also use high-performance epoxy grouts instead of standard cementitious grouts. Epoxy grout is waterproof, chemical-resistant, and stain-resistant, preventing discoloration and mold growth in tile joints, ensuring a clean, low-maintenance finish. For cabinetry design, see our guide on custom cabinetry and Toorak joinery. Epoxy grout is highly durable and holds tile edges securely under wet conditions.
7. Mechanical Ventilation: Moisture Control and Mould Prevention
High humidity levels in bathrooms can lead to condensation, damaging painted walls, causing wood rot in framing, and promoting mold growth. To manage moisture, we install high-capacity mechanical ventilation systems that exhaust damp air directly to the outside environment, complying with standard building regulations. We specify exhaust fans with integrated timer relays that keep the fan running for 10 minutes after the user leaves the room, ensuring all steam is cleared.
We also integrate smart humidity sensors (hygrostats) that turn the fan on automatically when relative humidity exceeds 60%. We paint ceiling and wall surfaces using low-VOC, anti-mould paint systems designed for wet areas. For historic paint standards, see our guide on heritage paint and Fitzroy restoration. Proper ducting paths are designed with minimal bends to maximize airflow and minimize fan noise, ensuring a quiet, healthy bathroom environment.
8. Plumbing Inspections and VBA Compliance Certification
Under Victoria building laws, all plumbing works must be executed by licensed plumbers and registered with the VBA. For any plumbing job exceeding $750 in value, the plumber must issue a formal Compliance Certificate. This certificate guarantees that the installations, including drain lines, hot/cold piping, and waterproofing checks, comply with standard AS/NZS 3500 and plumbing codes.
We coordinate independent inspections at key stages of the build, including the rough-in stage before wall sheeting, and the final inspection before handover. Compliance certificates are critical for maintaining your home's insurance coverage and validating build quality for future property valuations. We compile all trade compliance certificates and upload them to our digital client portal.
9. Bathroom Renovation Cost Projections and Budget Guide
A premium bathroom renovation requires specialized trades, waterproofing compliance, and high-quality materials. The total cost of a custom bathroom remodel in Melbourne typically ranges from $25,000 to $55,000+ AUD, depending on the layout complexity, stone benchtops, custom joinery, and fixture selections. Structural plumbing modifications and waterproofing account for approximately 30% of the total budget, while tiling and joinery represent 25% each.
We recommend establishing a 15% contingency buffer when remodeling bathrooms in older homes to cover hidden structural or plumbing repairs. To discuss your project and receive a custom estimate, contact our team through our website. Investing in high-density screeds, certified waterproofing, and epoxy grouts prevents water leaks and costly repairs, preserving the long-term value of your home.
10. Frequently Asked Questions (FAQ)
What is AS 3740, and why is it important?
AS 3740 is the Australian Standard governing the waterproofing of domestic wet areas. It sets out the minimum requirements for materials, membrane thickness, and application methods to prevent water leaks from damaging the building structure.
Why is a puddle flange required for shower drains?
A puddle flange is installed flush with the subfloor to collect any moisture that penetrates the tiles and grout, redirecting it into the drain pipe. Without a puddle flange, water would pool in the screed bed, leading to dampness, odors, and mold.
Can I lay new tiles directly over old tiles?
We do not recommend tiling over old tiles (known as "tile-on-tile") because it adds substantial weight to the wall or floor framing and prevents us from inspecting the underlying waterproofing membrane. A full strip-out ensures a stable, waterproof base for new tiles.
11. Bathroom Remodeling Synthesis
A flawless bathroom renovation requires combining beautiful design with precise wet area engineering. By enforcing AS 3740 waterproofing standards, installing sloped sand-cement screeds with SBR latex, and using low-porosity porcelain tiles with epoxy grout, builders can deliver bathrooms that are both elegant and highly durable. Certified plumbing works and proper mechanical ventilation protect the home's structural framing from moisture damage. Partnering with a registered building practitioner guarantees that all building works, waterproofing tests, and installations are fully compliant with Victorian building codes, adding lasting value to your home.